


Model Kits at Nerdbutiken.se: Find the Right Model Kit and Get Started Without Hassle
Do you want to unwind, create something with your hands, and at the same time build a truly impressive collection? Model kits have become one of the most beloved nerd hobbies – from sci-fi and fantasy to vehicles, figures, and dioramas. But the same question always arises: which kit is right for me, and what do I really need to avoid the frustration of poor fit, wrong glue, or a half-finished project in the box?
In this guide, I'll show you how to choose the right model kit at Nerdbutiken.se based on difficulty, scale, and build time – and which tools and accessories offer the most value for money. Whether you're a beginner, returning enthusiast, or looking to upgrade your setup, you'll get practical tips to avoid common mistakes and achieve a build you'll actually be proud of.
Nerdbutiken.se has made it easy to find model kits that match both taste and experience level – whether you want to build an iconic figure from film/TV, a sci-fi vehicle, a fantasy monster, or something suitable for an entire diorama. What is often highlighted in top-ranked content is that the breadth of the assortment plays a bigger role than one might think: the right theme and "type of build" affects how enjoyable the project will be, how quickly you reach your goal, and if the model actually ends up on display in the end.
Themes that Drive Motivation (Not Just Trends)
Instead of starting with "what's new," it's smarter to start with why you build. Choose a theme based on your motivation, and the chances of you completing – and enjoying – the build will increase:
-
Display & Interior Design: Choose kits with a clear silhouette, stable base, and suitable size for your shelf. This way, you get a nice "item" even without advanced painting.
-
Collection & Lore: Focus on model kits that are part of a series or universe you already follow. This makes it easier to build consistently and avoid impulse purchases.
-
Learning & Craftsmanship: Select a model kit with multiple stages (fit, details, possibly decals). You develop faster when each build teaches you something new.
-
Mindfulness & Relaxation: Go for a smaller kit with clear instructions and a good fit – perfect for stress-free building evenings.
This perspective is often missing from guides that only list "best model kits." Here's the point: motivation beats hype when you want a sustainable hobby.
Model Kits vs. Other Nerd Products – When Are Model Kits the Right Choice?
A model kit differs from collectible figures, puzzles, and board games in that you create the result yourself. Choose model kits when you want creative control: you can build "clean" straight out of the box, or later upgrade with painting, weathering, and a diorama. If, on the other hand, you want something ready to display immediately, a pre-built figure is often better. The right choice is less about price – and more about the experience you want to have.
How to Choose the Right Model Kit: Difficulty, Scale, and Build Time
Finding the right model kit at Nerdbutiken.se is rarely about "the coolest box" – but about matching the kit's level with your time, patience, and how you want the final result to look. Top-ranked content usually highlights the same pain point: many get discouraged when their first model kit becomes too advanced, takes too long, or requires tools they don't have. With a few simple rules of thumb, you can choose smartly and achieve a build that actually gets finished.
Understanding Difficulty: What Makes a Kit Easy or Hard
-
Number of parts and small details: More parts often mean more steps (cleaning, fitting, joints) and longer build time.
-
Fit and tolerances: Beginner-friendly kits often have better "snap-fit" / clear connections, while advanced kits require more adjustment and filler/sanding.
-
Clarity of instructions: Look for steps that build sub-assemblies – this is a sign of higher complexity.<
-
Moving parts and special features: Joints, LED preparations, or many decals increase difficulty even if the model isn't large.
Unique angle: view difficulty as decision friction. The more choices you have to make (paint now or later? glue or not? masking?), the more "mental budget" the build requires.
Scale + Build Time: A Practical Matching Test (3 Questions)
-
How much time do you have per week? If the answer is 1–2 evenings: choose a kit that can be built in short stages without drying/glue becoming an obstacle.
-
How much space do you have at home? Smaller scales can be perfect for shelves, but often require more fine motor skills for details.
-
Do you want to paint? If you want to build "clean" without painting: prioritize kits with good color separation and excellent surface refinement.
Read through the instructions before starting, sort parts, and dry fit – these are the three simplest habits that reduce re-dos and make your first choice at Nerdbutiken.se feel like a bullseye.
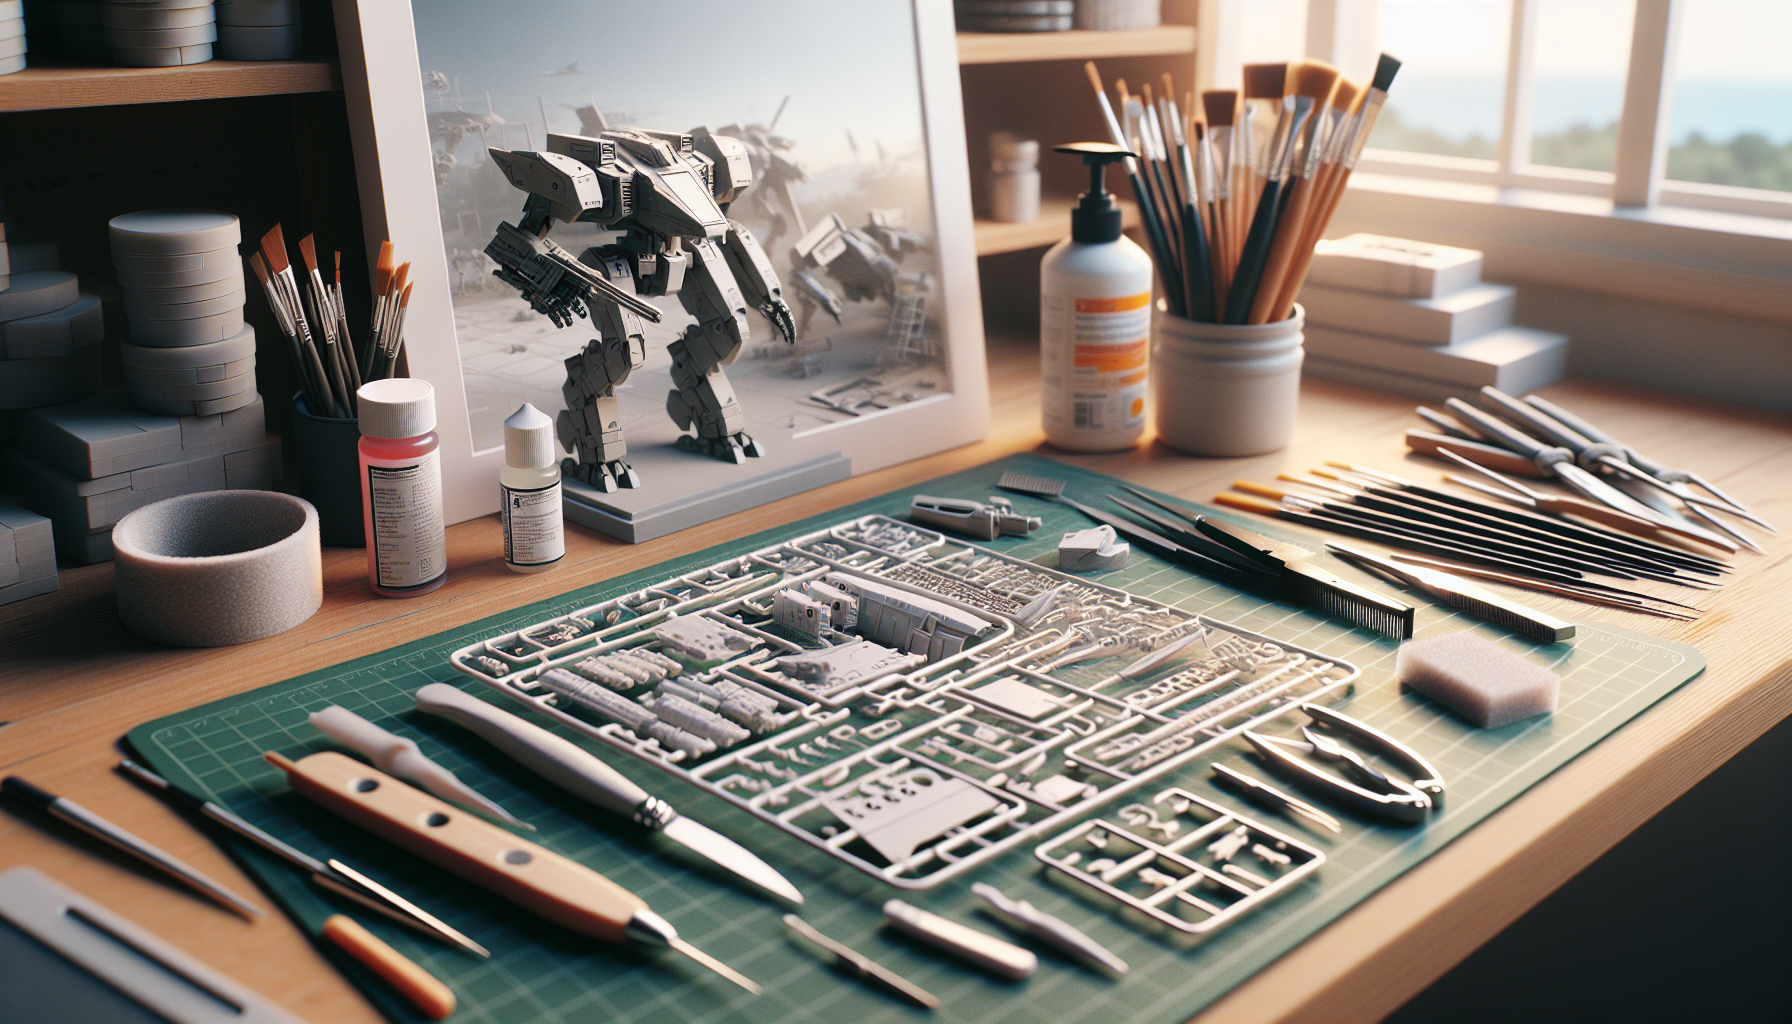
Tools and Accessories That Make a Big Difference (Without Breaking the Bank)
Many who start with model kits at Nerdbutiken.se believe they need "everything" right away: glue, paints, special tools, and expensive equipment. Top-ranked guides, however, emphasize that the right basic tools have the greatest impact on the result – and that you can upgrade gradually as you discover what type of model kit you actually enjoy building (figures, vehicles, mecha, or dioramas).
The Basic Kit That Lasts Longer Than You Think
If you want to build beautifully from the start, this is the most cost-effective foundation (and it covers the most common beginner problems like ugly "nubs," crooked cuts, and messy glue):
-
Flush cutters: Provide cleaner cuts from the sprue and reduce post-processing with sanding.
-
Hobby knife + extra blades: For cutting off excess material and trimming for fit – change blades often for safety and precision.
-
Files/sandpaper in various grits: Start coarser to remove marks, finish finer for a smooth surface.
-
Tweezers: Unexpectedly important for small parts, decals, and when you want to avoid fingerprints on delicate surfaces.
-
The right glue for the right model kit: Plastic cement for polystyrene kits, CA/superglue for resin/metal or when plastic cement doesn't "bite."
Unique budget insight: it's better to buy fewer but better tools. A good pair of flush cutters and a couple of sanding tools do more than ten "nice-to-have" items that are rarely used.
When It's Worth Upgrading – And How to Avoid Bad Purchases
After 2–3 builds, you'll know if you want to spend more time on finishing. That's when upgrades like a cutting mat, clamps, panel liner, primer, and topcoat become relevant. An airbrush is fantastic – but only when you build frequently and want an even finish on larger surfaces.
Safety often overlooked in other articles: prioritize good lighting, ventilation when spraying/priming, and a simple dust brush/microfiber cloth to avoid particles adhering to the finish. With this "smart setup," every building evening will be both more enjoyable and more consistent in quality.
Building Techniques for Professional Results: Fit, Cleaning, and Finish
The biggest difference between an "okay" build and one that looks store-quality rarely lies in how expensive the kit is – but in the technique between the steps. Top-ranked content often highlights the same basic recipe: take it slow, follow the instructions, and dry fit before gluing. Here, we build on that and make the process more systematic, so that your model kits from Nerdbutiken.se have cleaner joints, sharper lines, and a finish that lasts over time.
Preparation That Saves Hours Later
-
Remove sprue gates and "nub marks" immediately: Cut parts with a little margin, then trim clean and sand in multiple grits (e.g., coarse → fine) for a smooth surface.
-
Wash parts when needed: Some model kits may have mold release from production. Lukewarm water + a drop of dish soap and allow to dry completely before assembly.
-
Dry fit everything that will meet: Especially for two-part bodies, wings, hulls, and larger panels. You'll discover early if something needs sanding or adjusting.
An underestimated detail is to mark "critical joints" already when you browse through the instructions: which seams will be most visible? Spend extra time there and build faster on the rest – it provides maximum effect without prolonging the project.
Glue, Joints, and a "Three-Step Quality Check"
-
Choose the right glue type: Plastic cement for plastic-to-plastic provides a strong bond and can "melt" surfaces together; CA/superglue is suitable for mixed materials or small spot bonds where cement doesn't bite.
-
Avoid mess: Apply glue sparingly from the inside where possible, and use capillary action (thin cement) along a pressed joint.
-
Reinforce delicate parts: Thin antennas, weapons, and joints can benefit from pinning (a small metal wire) if the model will be handled frequently.
Quality check: before (dry fitting + sanding), during (check alignment and press the joint together), after (sand seam, light polish, and wipe off dust). This routine dramatically reduces re-dos – and ensures you get a beautiful "clean build" even without painting.
Finish Without Painting – When a "Clean Build" Is the Whole Point
Many model kits (especially in sci-fi and anime) are designed to look good directly in plastic. Focus then on sharp edges, even joints, and avoiding fingerprints: use thin cotton gloves during final assembly and finish with a gentle wipe. The result will be a neat display build that looks well thought out – even before you bring out primer and paint.
Painting and Weathering Model Kits – From Beginner Level to Display Quality
Painting is often what takes a model kit from "nicely built" to truly alive. At the same time, this is where many get stuck: which paint to choose, do you need to prime, and how do you avoid runs and messes? With the right method (and realistic expectations), you can achieve professional results even on your first model kit from Nerdbutiken.se – without buying everything at once.
Choose Your Painting Method: Brush, Spray, or Airbrush
The choice depends on the surface, detail level, and how much time you want to spend – not on "what you should do." A good start is to combine techniques:
-
Brush for details: Perfect for small areas, insignia, and touch-ups. Use thin layers and let each layer dry – this reduces brush strokes.
-
Spray can for larger surfaces: Quick and even on armor, vehicle hulls, and bases. Maintain the correct distance and spray in short, light passes to avoid orange peel.
-
Airbrush when you want to upgrade: Provides smooth transitions and control, but requires cleaning and some practice. Worth it when you've built 2–3 kits and know you'll continue.
The key that top-ranked guides often return to: primer. It provides better adhesion and a smoother color, especially if the plastic is shiny or if you plan to mask.
Realistic Weathering (Without Overdoing It)
Weathering is about telling a story: where does the model wear, where does dirt accumulate, where are there scratches? Try this simple order:
-
Panel accent/wash in lines and recessed details for more depth
-
Dry brushing on edges to bring out relief
-
Wear in "contact zones" (corners, handles, footrests) instead of over the entire model
Unique rule of thumb: choose style according to theme. Clean build often suits anime/sci-fi and a "showroom" feel, while vehicles and post-apocalyptic models benefit from more wear.
Common Painting Problems – And Quick Solutions
Runs? You applied too thickly – let dry, sand lightly, repaint thinly. Dust in the paint? Let cure and polish/topcoat again. Unsure about the color scheme? Paint a test piece on a hidden part or a leftover plastic piece before applying to the entire model kit.
With a simple process (primer → thin layers → seal with topcoat), you'll get a durable, photo-friendly result that truly showcases your model kits from Nerdbutiken.se.
Present, Protect, and Collect: Storage, Display Cases, and Diorama Building
Once you've built a model kit from Nerdbutiken.se, you want the result to last – both visually and physically. In top-ranked content, the same questions reappear: "How do I protect against dust?", "Does plastic fade in the sun?", and "How do I move a model without breaking it?". The key is to think about display and storage even before the last part clicks into place, so that your model doesn't become a delicate shelf problem.
Display That Elevates the Build (And Reduces Maintenance)
A good presentation does more than look nice – it reduces the risk of damage and saves time on cleaning:
-
Display case or dust cover: Glass/acrylic keeps dust and curious fingers away; perfect for figures and vehicles with small details.
-
Right light: Avoid direct sunlight which can fade paint/decals; opt for soft LED lighting for even exposure.
-
Stable base: A simple plate (wood, acrylic, or MDF) allows you to move the model safely without gripping delicate parts.
Unique angle often missed: create a "rotation shelf." Keep 2–3 models in a display case and the rest in boxes – you get variety without everything collecting dust all year round.
Transportation tips for moving or events: use a plastic box with a lid, place foam or bubble wrap at the bottom, and secure the base with Velcro/tape. Pack loose accessories (weapons, antennas, small parts) in a separate bag so you don't have to search for parts at the bottom of the box.
Dioramas and Photo Guide: Make Your Model Kit "Tell a Scene"
A diorama doesn't have to be complex: a simple terrain base, some sand/stones, and a cardboard background can have an enormous effect. Bonus: learn to take better phone photos by shooting near a window (indirect light), using a neutral background, and locking focus – it makes a big difference when you share your builds in the community and get feedback.
Section 7: Buying Guide – How to Find the Right Model Kit at Nerdbutiken.se (Filtering, Comparison, and Timing)
Once you know which theme you like, the next step is to find a model kit that actually fits your daily life – budget, time, and ambition level. Top-ranked guides tend to get stuck on "best for beginners," but often miss how to shop smartly in an e-commerce store. Here you get a practical method for choosing among model kits at Nerdbutiken.se without drowning in options or accidentally buying the wrong accessories.
Navigate Smartly: Filter by Your Goal, Not by FOMO
Start by setting the framework and use filtering/categories to quickly narrow down the right kit:
-
Set a project goal: do you want a quick weekend build, a display piece, or a long-term project with painting?
-
Filter by price and type: focus on one category at a time (e.g., figures, vehicles, diorama accessories) to reduce "choice stress."
-
Interpret product texts correctly: look for the number of parts, approximate dimensions, and if glue/paint is usually needed (common beginner question).
-
Check movable parts and detail level: more movement and more small parts = often longer build time and higher demands on precision.
Unique shortcut: create a "rule" before you click "buy" – e.g., that the first kit should be buildable with basic tools and without having to buy ten extra products at the same time.
What is rarely mentioned in other articles is the comparison between "almost identical" kits. Do a mini-comparison of two candidates: choose the one with clearer instructions, more stable fit (if indicated in reviews/ratings), and a size that actually fits where you want to display it.
Timing and Project List: Build a Hobby That Lasts Over Time
To avoid impulse purchases: monitor news, back in stock, and campaigns – but also build a simple project list: 1 easy kit + 1 medium + 1 dream kit. Then you'll always have something that suits your energy level. A good start is to choose a kit that you can realistically complete in 1–2 weekends and supplement it with a small, well-chosen tool kit when you shop at Nerdbutiken.se.
Frequently Asked Questions (FAQ)
Q: Are model kits at Nerdbutiken.se good for beginners, or is prior knowledge required?
A: Many model kits are excellent for beginners – the key is to choose the right difficulty level and type. Look for kits with clear instructions, fewer parts, and a good fit. If you want an extra soft start: choose a project you can build "clean" without advanced painting, and supplement it with a simple tool kit (flush cutters + hobby knife + file/sandpaper).
Q: Do I need glue when building, or are there model kits that "snap together"?
A: It depends on the model type. Some kits are designed for snap assembly (push-fit), while others require glue for durability and neat joints. Always read the product description and building instructions before you start. Unique rule of thumb: if the model has many small contact points or thin parts, glue usually provides better stability – but dry fit first to avoid tension in the plastic.
Q: How do I know which scale to choose – and what does it practically affect?
A: The scale controls everything from the level of detail to how much space the model takes up at home. A smaller scale can be faster and cheaper, but sometimes requires more precision in handling. A larger scale gives more “wow” on the shelf and is often easier to paint and weather, but takes up more space. Consider display space, budget, and whether you want to build a diorama before deciding.
Q: What are the most common beginner mistakes – and how do I avoid them?
A: The most common are rushing, skipping dry-fitting, and using the wrong glue/paint. Follow a quick routine: read the instructions, sort parts, dry-fit, remove sprue gates, and assemble in stages. Also, allow time for drying (glue, primer, varnish) – many "failures" are actually just due to insufficient drying time.
Q: Do I have to paint to get a nice result?
A: No. A “clean build” can look really professional if you focus on clean seams, smooth surfaces, and even edges. If you still want to enhance it without painting everything: try a panel liner, a light wash, or a matte/satin topcoat to even out the shine and add more depth.
Q: How do I protect finished models from dust and sun fading?
A: For the best long-term protection: place the model in a display case or under a dust cover, avoid direct sunlight, and use a topcoat (matte/satin/gloss depending on the style). For transport: secure the model in a box with foam/bubble wrap so it cannot “move” – loose parts are the most common cause of damage.
Q: How do I find the right kit on Nerdbutiken.se without impulse buying the wrong one?
A: Create a simple project list: 1 easy kit (1–2 weekends), 1 intermediate (for new techniques), and 1 dream kit (motivational goal). Then filter by theme, price, and level, and compare product descriptions (size, tool recommendations, if paint/glue is needed). Keep an eye out for "back in stock" and promotions – but stick to your list to avoid half-finished projects on the shelf.
Next step: make your next build easier (and more fun)
Model kits are at their best when theme, difficulty, and tools align. If you choose a kit that matches your motivation (display, collection, or pure relaxation), plan your build time realistically, and work methodically with dry-fitting, cleaning, and finishing, you'll get a better result with less frustration. Add smart upgrades like primer/topcoat or simple weathering only after you've mastered the basics – then you'll see immediate progress without the hobby becoming expensive or complicated.
Want to get started today? Visit Nerdbutiken.se and create a small “project list”: 1 easy kit that you can finish in 1–2 weekends, 1 intermediate to grow with, and 1 dream kit to look forward to. Filter by theme and difficulty, read the product description carefully (scale, dimensions, if glue/paint is needed), and at the same time add a minimal tool list: side cutters, hobby knife, and file/sandpaper. Click home, build the first part slowly – and let the rest of the journey take shape.